

How To Replace Your Car Interior Dome Light?
Views: 0 Author: Site Editor Publish Time: 2026-06-19 Origin: Site


Standard incandescent car interior lights have a predictable, finite lifespan, often failing when visibility is most critical. Replacing a failed bulb seems simple, but selecting a replacement that withstands automotive voltage fluctuations, avoids CAN bus errors, and provides consistent lumen output requires technical evaluation beyond basic fitment. You need components that handle thermal cycling and constant vibration without degrading prematurely.
This guide breaks down the step-by-step replacement process, evaluates the structural differences between standard and LED upgrades, explores auxiliary interior lighting expansions (such as map lights and footwell lighting), and highlights the industrial quality assurance standards that separate premium lighting components from unreliable aftermarket alternatives.
Form Factor vs. Function: Identifying the correct bulb size (e.g., 578, 211-2, DE3175) is only the baseline; thermal management, polarity, and finding specific housing pry notches dictate long-term success.
The LED Upgrade Ecosystem: Modernizing your vehicle's interior often involves upgrading both the central dome light and adjacent map lights to achieve uniform color temperature.
Manufacturing Quality Matters: Premium automotive LED replacements are rigorously tested during manufacturing using advanced automated optical inspection to ensure solder joint integrity and diode alignment.
Risk Mitigation: Utilizing non-marring tools to access the factory notch and disconnecting power prior to installation prevents housing damage and blown body control module (BCM) fuses.
Problem Framing: Why Standard Dome Lights Fail and Success Criteria for Replacements
Identifying the Root Cause of Failure
Incandescent bulbs rely on tungsten filaments to generate illumination. These delicate filaments suffer physical degradation over time due to constant automotive vibration and severe thermal cycling. Every time you drive over rough terrain, the heated filament weakens. Eventually, the filament snaps, leaving the cabin dark. You must differentiate between a simple blown bulb and deeper electrical faults. Corroded housing contacts, faulty door switches, or blown interior lighting fuses can mimic a dead bulb. Testing the circuit with a multimeter ensures you address the actual root cause rather than just throwing parts at the problem. A standard 12V automotive circuit will show 12.6V at the socket when the door switch is engaged. If you read zero volts, the issue lies upstream in the wiring harness or the fuse box.
Vibration is the enemy of traditional lighting. Off-road vehicles, heavy-duty trucks, and even daily commuters navigating pothole-ridden streets subject their interior components to constant shock. The glass envelope of an incandescent bulb can also separate from its metal base if the bonding adhesive degrades from heat. When diagnosing a failure, always inspect the glass for a dark, metallic haze. This indicates the tungsten has vaporized and deposited on the inside of the glass, a clear sign of end-of-life failure.
Success Criteria for a Replacement Dome Light
Selecting the right replacement requires evaluating several technical factors. Lumen output and color temperature dictate your cabin visibility. You might choose a 3000K warm white for a factory OEM look. Alternatively, a 6000K cool white provides high contrast for reading maps or locating lost items. Thermal dissipation is equally critical. You must evaluate the heat sink capabilities of the replacement bulb to prevent melting the surrounding plastic lens housing. Finally, verify electrical compatibility. Ensure the replacement meets the specific wattage and voltage parameters of your vehicle's electrical system to avoid triggering dashboard errors.
Automotive electrical systems are not perfectly stable. While rated at 12 volts, an alternator actively charging a battery can push system voltage up to 14.4 volts or higher. A high-quality replacement must feature internal voltage regulation to handle these spikes without burning out the light-emitting diodes. Cheap replacements lack this circuitry, leading to flickering and premature failure within weeks of installation. Always check the operating voltage range on the product specifications; a range of 9V-16V indicates a robust internal driver.
Solution Categories: Incandescent vs. LED Dome Light Upgrades
Direct OEM Incandescent Replacements
Direct OEM incandescent replacements offer guaranteed CAN bus compatibility. They feature a predictable dimming curve when the doors close. They also have a very low upfront cost. However, these bulbs generate high heat and consume more power. Their operational lifespan is significantly shorter compared to modern alternatives. You will likely replace them again within a few years. The heat generated by these bulbs can also make the plastic lens brittle over time, increasing the risk of cracking during future replacements.
For restoration projects or classic cars where maintaining absolute factory originality is required, incandescent bulbs remain the standard choice. They provide a specific warm glow that period-correct interiors demand. However, for daily drivers and modern vehicles, the drawbacks heavily outweigh the benefits. The power draw of a standard 578 incandescent bulb is roughly 10 watts. Leaving a door ajar overnight with incandescent bulbs will drain a standard car battery much faster than an LED equivalent.
Aftermarket LED Upgrades
Aftermarket LED upgrades provide superior energy efficiency and directional light output. They boast an extended lifespan of up to 50,000 hours. Despite these benefits, they introduce new challenges. You face the potential for hyper-flashing or residual glow if the bulbs lack built-in CAN bus error-canceling resistors. Furthermore, LEDs have strict polarity requirements. If you install them backward, they simply will not illuminate.
The directional nature of LEDs requires careful selection of the bulb design. A standard incandescent bulb emits light in 360 degrees. If you install a flat LED board in a housing designed for a 360-degree bulb, the light output may be uneven or misdirected. Look for LED replacements that feature multiple diodes arranged in a cylindrical pattern or utilize a diffuser lens to replicate the omnidirectional output of the original bulb. This ensures the entire cabin receives adequate illumination without harsh shadows.
Lighting Type | Lifespan | Power Consumption | Heat Generation | CAN Bus Compatibility |
|---|---|---|---|---|
Incandescent | 1,000 - 2,000 hours | High (approx. 10W) | High | Native |
Standard LED | Up to 30,000 hours | Low (approx. 1-2W) | Low | Requires External Resistors |
CAN Bus LED | Up to 50,000 hours | Medium (approx. 3-5W) | Medium (requires heat sink) | Built-in |
Comprehensive Interior LED Kits (Map, Dome, and Footwell Strip Extensions)
Single-bulb replacements address immediate failures. Complete vehicle interior kits cover dome lights, map lights, vanity mirrors, and trunk spaces. These kits ensure a uniform color temperature across the entire cabin. You can also integrate secondary adhesive-backed LED light strips positioned in footwells. These strips complement overhead lighting and create unified ambient illumination. Routing the wiring cleanly integrates these additions into the factory lighting circuit.
When installing comprehensive kits, pay attention to the specific bulb sizes required for each location. A kit designed for a specific vehicle model eliminates the guesswork of cross-referencing bulb numbers. Footwell lighting extensions often require tapping into the existing dome light circuit. This involves running a wire down the A-pillar and connecting it to the positive and negative leads of the overhead console. Using proper wire taps and securing the wiring with zip ties prevents rattles and ensures a professional-grade installation.
Evaluation Dimensions: The Role of Quality Assurance in Automotive LED Manufacturing
Automated Optical Inspection in Component Manufacturing
Premium automotive LED manufacturers differentiate their products from cheap alternatives through rigorous quality control on the assembly line. They utilize automated optical inspection (AOI) to verify component integrity. Inspecting micro-solders and diode placement on the LED PCB is necessary to prevent premature failure from vehicle vibration. Poor solder joints crack under stress, causing flickering or complete failure. AOI systems catch these defects before the bulbs leave the factory.
The AOI process involves high-resolution cameras scanning each printed circuit board as it moves down the production line. The software compares the captured image against a perfect reference model. Any deviation, such as a misaligned resistor, insufficient solder paste, or a bridged connection, triggers an immediate rejection. This level of precision is impossible to achieve with manual human inspection, especially given the microscopic size of modern surface-mount components.
Utilizing a Machine Vision Light Source for Defect Detection
Automated QA systems use a specialized machine vision light source to illuminate the automotive LED boards during production. This lighting reveals surface imperfections that human eyes miss. High-contrast imaging detects microscopic cracks in the substrate before the bulb is shipped to consumers. Consistent illumination ensures the inspection cameras capture accurate data across thousands of units.
The angle and intensity of the machine vision light are calibrated to highlight specific types of defects. For example, low-angle lighting casts shadows across raised solder joints, allowing the system to measure their height and volume. Coaxial lighting eliminates reflections from flat, shiny surfaces, making it easier to read laser-etched part numbers and verify component orientation. This dynamic lighting environment is critical for maintaining high production yields and minimizing field failures.
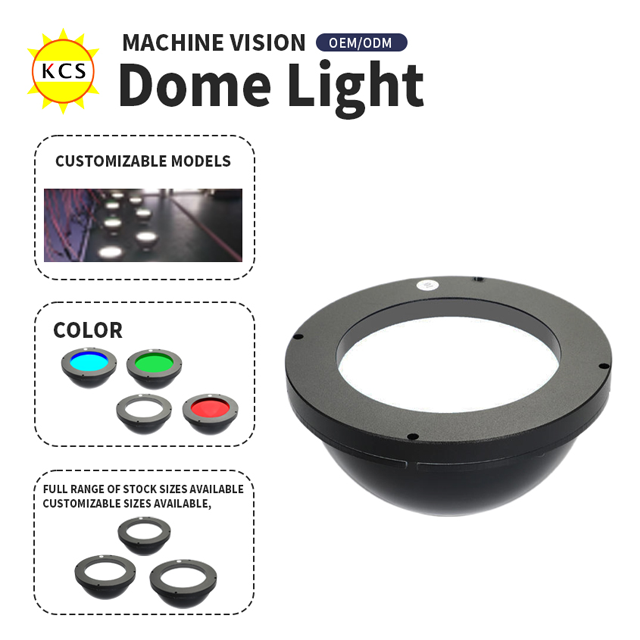
The Function of an LED Dome Light for Visual Inspection
Factories utilize an industrial machine vision dome light to create shadow-free, uniform illumination over the highly reflective surfaces of automotive LED components. This specialized equipment prevents glare from masking solder defects. Contrast the industrial LED dome light for visual inspection with the consumer car dome light. Industrial-grade testing ensures consumer-grade reliability. The precision required to manufacture reliable automotive LEDs heavily depends on these advanced inspection tools.
The internal surface of the industrial dome is coated with a highly reflective, matte material. Light from LEDs positioned at the base of the dome bounces off this coating, creating a perfectly diffuse, indirect light source. This eliminates the harsh specular reflections that typically occur when inspecting glossy PCBs or metallic solder joints. By providing a uniform background, the vision system can accurately identify the boundaries of each component and detect subtle variations in surface texture.
Sourcing from a Reliable Machine Vision Dome Light Supplier
Top-tier automotive lighting brands partner with a reputable machine vision dome light supplier to build their QA infrastructure. Buyers should look for automotive LED brands that transparently advertise automated optical inspection in their manufacturing process. This transparency correlates directly with lower failure rates in the vehicle. High manufacturing standards translate directly to longevity in your car's cabin.
When evaluating aftermarket LED brands, check their technical documentation or website for mentions of their quality control processes. Brands that invest in advanced inspection technology are more likely to use high-quality components and robust circuit designs. This upfront investment in manufacturing infrastructure ultimately saves the consumer time and frustration by delivering a product that works reliably out of the box and withstands the harsh automotive environment.
Implementation: Step-by-Step Car Interior Dome Light Replacement
Required Tools and Safety Precautions
Gather the necessary tools before starting. You need non-marring plastic trim removal tools, dielectric grease, electrical contact cleaner, and a microfiber cloth. Safety is paramount. You must disconnect the negative battery terminal or pull the specific interior light fuse to prevent short circuits. Working on live circuits risks blowing the body control module, leading to expensive repairs.
Locate the interior fuse box, usually found under the dashboard or in the engine compartment.
Consult the owner's manual to identify the specific fuse labeled "Interior Lights," "Dome," or "Room."
Use a fuse puller or needle-nose pliers to remove the fuse.
Verify the power is off by opening the car door; the interior lights should remain off.
Locating the Access Notch and Removing the Lens Safely
Inspect the plastic lens covering the bulb. Locate the small pry slot or opening notch positioned between the lens and the plastic molding. Insert the plastic pry tool gently into the notch. Apply steady pressure to pop the tabs without cracking the brittle plastic or snapping the lens retention clips. Housing designs vary greatly. Some feature friction-fit lenses, while others require unscrewing the entire console unit from the headliner.
If you cannot find a visible notch, examine the perimeter of the lens closely. Sometimes the notch is hidden on the side facing the windshield or the rear window. Never force the tool. If the lens resists, you may be prying against a solid mounting point rather than a release tab. Slide the tool along the edge until you feel the resistance yield. For older vehicles, the plastic may be extremely brittle due to UV exposure and heat cycling. Applying gentle, even pressure across a wider area using a broader trim tool reduces the risk of cracking.
Navigating Multi-Bulb Consoles (Dome Lights vs. Map Lights)
Overhead consoles often house multiple bulbs. Differentiate the central overhead bulb from the flanking map light bulbs. The central bulb usually illuminates when doors open. Map lights operate via manual switches. Extracting and replacing different bulb form factors within the same housing requires care. You might find festoon bulbs for the main cabin lighting and wedge bulbs for directional map lights.
When dealing with multi-bulb consoles, replace one bulb at a time to avoid confusing the locations or losing track of which bulb goes where. Map lights often use a reflector housing to focus the beam. Ensure the new LED bulb is seated correctly within this reflector to maximize light output. If the console includes a sunglass holder or sunroof controls, be careful not to disturb the wiring harnesses for these adjacent components while accessing the light sockets.
Bulb Extraction and Contact Cleaning
Use the proper technique for removing festoon or wedge-style bulbs without shattering the glass. Push festoon bulbs against the spring-loaded terminal to release them. Pull wedge bulbs straight out. Inspect the metal terminal contacts for oxidation. Clean them with electrical contact cleaner to ensure optimal conductivity. Applying a tiny amount of dielectric grease prevents future corrosion.
If a bulb is stuck, do not squeeze the glass with pliers. Instead, wrap a piece of tape around the bulb to gain better grip, or use a specialized bulb removal tool. For festoon bulbs, the spring terminals can lose tension over time. Gently bend the terminals inward slightly to ensure a tight fit for the new bulb. A loose connection will cause the light to flicker over bumps and can generate excess heat due to electrical arcing.
Installing the New Dome Light and Testing Polarity
Insert the new dome light carefully into the terminals. LED replacements are often polarity-sensitive. Temporarily reconnect power and test the light. If it fails to illuminate, remove the bulb, flip it 180 degrees, and reinstall it. Once you confirm the light functions correctly, snap the plastic lens back into place securely.
When handling the new LED bulb, avoid touching the yellow diode chips directly. Oils from your skin can degrade the silicone coating and reduce the lifespan of the component. Hold the bulb by its base or heat sink. Before snapping the lens back on, cycle the door switch and the manual override switch to ensure the bulb operates correctly in all modes. Check for any flickering or delay in illumination.
Optional Step: Installing Complementary Footwell LED Strips
Enhance your cabin by installing accent light strips near the foot space. Clean the mounting surface thoroughly. Peel the adhesive backing and mount the strips securely. Route the power wiring clean and flat under the trim panels to avoid interference with driving pedals. Integrate the wiring into the overhead switch circuit for synchronized operation when the doors open.
Use rubbing alcohol to prep the plastic surfaces under the dashboard before applying the adhesive strips. Dirt and interior protectants will prevent the adhesive from bonding properly. Secure the wiring harness with zip ties, ensuring it is routed well away from the steering column, brake pedal, and accelerator. Tap into the dome light circuit using T-taps or by soldering the connections directly for a more permanent and reliable installation.
Implementation Risks & Mitigation
Preventing Short Circuits and Blown Fuses
Using metal screwdrivers to pry out live bulbs frequently shorts the circuit against the roof metal. This simple mistake blows fuses instantly. Strict adherence to plastic pry tools and power disconnection mitigates this risk entirely. Always verify the circuit is dead before inserting any tool into the housing.
If you accidentally blow a fuse, do not replace it with a higher amperage rating. This can cause the wiring harness to overheat and potentially start a fire. Always use the exact amperage specified in the owner's manual. Keep a small assortment of spare fuses in your glovebox for emergencies. Identifying the correct fuse beforehand saves time and frustration if a mistake occurs during installation.
Addressing LED Flickering and Residual Glow
LEDs draw very little power. The vehicle's diagnostic system might leave them dimly lit when the car is off. This residual glow drains the battery over extended periods. Selecting CAN bus-ready LEDs with integrated load resistors solves this issue. The resistors mimic the load of standard incandescent bulbs, satisfying the vehicle's computer.
Flickering can also be caused by pulse-width modulation (PWM) dimming circuits used in modern vehicles. These circuits rapidly turn the power on and off to dim the lights. Standard LEDs may flicker visibly under PWM control. High-quality LED replacements include constant-current drivers that smooth out the PWM signal, providing a stable, flicker-free dimming experience that matches the factory incandescent behavior.
Heat Management in Enclosed Housings
High-output LEDs generate localized heat that degrades the surrounding plastic over time. Enclosed housings trap this heat. Evaluating the physical aluminum heat sink on the back of the replacement LED prior to purchase is crucial. Adequate thermal management ensures the LED operates within safe temperature ranges, protecting both the bulb and the vehicle trim.
Avoid installing excessively high-wattage LED panels in small, unventilated map light housings. While the initial brightness may be impressive, the lack of airflow will cause the LED chips to overheat and fail prematurely. Stick to replacements that closely match the physical dimensions of the original bulb and feature visible aluminum cooling fins or a solid metal body to dissipate heat effectively.
Conclusion
Identify your vehicle's specific bulb size via the owner's manual or an automotive bulb database before purchasing replacements.
Procure a high-quality LED replacement featuring built-in CAN bus compatibility and an aluminum heat sink.
Gather non-marring plastic pry tools, dielectric grease, and contact cleaner to protect your interior trim and ensure a solid connection.
Disconnect the negative battery terminal or pull the interior lighting fuse to prevent short circuits.
Allocate 15 to 30 minutes for safe installation, testing the polarity of the LED before reassembling the housing.
FAQ
Q: What size dome light do I need for my car?
A: Check the vehicle owner's manual or use an automotive bulb finder database. Common sizes include Festoon 31mm, 36mm, 41mm, or T10 wedge bulbs. Verifying the exact size ensures proper fitment and prevents damage to the terminal clips.
Q: What is the difference between a dome light and a map light?
A: While both are interior lights, a central overhead light typically provides broad ambient illumination for the entire cabin when doors open. Map lights are directional spotlights controlled manually by passengers for reading or specific tasks.
Q: Why does my new LED interior light stay dimly lit when the car is off?
A: LEDs require very little power to illuminate. Residual current in the vehicle's electrical system can cause them to glow. Installing CAN bus-ready LEDs with built-in load resistors resolves this issue by absorbing the residual current.
Q: Can I use a metal screwdriver to remove the plastic lens cover?
A: No. Using a metal screwdriver risks scratching the plastic trim, cracking the brittle lens, and shorting the electrical contacts against the metal roof structure. Always use non-marring plastic trim removal tools.
Q: What does polarity-sensitive mean for LED bulbs?
A: Polarity-sensitive means the LED bulb only works when electrical current flows in one specific direction. If you plug the bulb in and it does not light up, you simply need to remove it, flip it 180 degrees, and reinsert it.
Q: Do I need to disconnect the battery to change an interior bulb?
A: Yes, disconnecting the negative battery terminal or pulling the specific interior lighting fuse is highly recommended. This prevents accidental short circuits that can blow fuses or damage the vehicle's body control module during installation.


